Magless 2005 Showcase
Section two – second 35 participants
From Tenmile OR
How I did what I did: with the help of a lot of coffee, teeth-gnashing
and blue air. I wound up making several different kinds of maggies, some
of which I liked a lot better than others. Some have abstract
"pictures," created by arranging bits of confetti. Some
are three or four layers of thin irid clear which had foils between
layers; the foils burned out leaving ghosts and bubbles and subtle
tints. Some were full-fused slabs, which I broke
into smaller chunks. I arranged these chunks on a piece
of clear, added different things depending on my mood (stringer, bits of
dichro, crushed clear irid), topped everything with another layer of clear and
fired to full fuse. Cut up the result; ground the edges and fire
polished. Some are in need of no explanation, but, overall, there's no
great mystery or difficulty about what I did. I wish there were.
Maybe next year...
What I learned:
·
That
there's a big gap 'twixt inspiration and execution.
·
That
time disappears like silver foil in a full fuse.
·
That
it's a bad idea to take a year off from fusing, even if it's because of moving
and having to build from scratch (still no house); it’s like learning all
over again.
·
That
I'm easily distracted.
·
That
no matter how disappointing my results, no matter how frustrated I get, no
matter how incompetent I sometimes feel, the glass is still so seductive, so
beautiful and so sensual that I am still completely hooked on it, and
still having fun.

39 Rebecca McGlynn
 “Roy G. Biv”
Twisted canes pulled from my vitrigraph in reds, oranges,
yellows, etc., colors. These were placed side-by-side to (supposedly) look
like a rainbow. Fused in strips on white on top of clear, cut and fire
polished. Bullseye glass.
 Combing
or raking
Combing
or raking
Steps:
1. Have your grown children move to Boulder, Colorado to attend
college
and decide to remain
there after graduation.
2. Visit them on a regular basis and look in yellow pages for
“glass”
shops.
3. Visit D&L Stained Glass and go crazy, become a
customer.
4. Sign up for their Patty Gray “Bowl “class and have a ball
5. Go home and play with the “combing” technique
6. Cut strips of glass into 5” x 1/4”
7. The strips are
placed vertically on fiber paper. On
each end place
horizontally two strips
to hold glass vertically.
8. Because I was using my small kiln (I was afraid to use my
large kiln
with elements in the top,
no one to help holding it open, no one crazy enough in my family to volunteer),
there was no formula for temperature increase; I increased the heat to 1600.
9. Turn off kiln; use newly purchased stainless steel combing
rods from D
&
L to manipulate the glass.
10. Turn kiln back on and reach 1600 again.
11. Once glass to smooth flash vent to 960
and I turned off the kiln to cool on its own.
12. Use tile saw to cut into 1”x1” squares,
fire in kiln to smooth edges.
13. For better directions and details on
safety issues, see Patty’s
website:
[http://www.pattygray.com/demo/combingdemo.html
]
http://www.pattygray.com/demo/combingdemo.html
What I learned:
·
Patty Gray is an excellent teacher
·
D&L people put on an awesome workshop
with great participates (not to
mention
the food)
·
Change colors often when setting up glass
vertical if making small
pieces
so the combing shows.
·
Use the equipment that you have. I own a tile saw because I have laid
lots
of tile in the house but never used it for glass.
·
Take sons out for dinner and thank them for
housing you (that way you
always
have a place to stay for the next D&L workshop.)
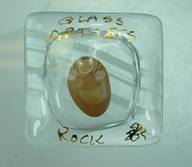
Glendale (Los Angeles), CA
"GLASS ARTISTS ROCK”
BACKGROUND:
I love rocks. I love
glass. I still think the pet rock idea was pure brilliance... On my motorcycle
trips in the past, I have stashed many pounds of rocks in my now ex-husband's
saddle bags claiming they were heavy because of clothes and papers. (He didn't
like rocks like I did and would've objected).
So the natural
marriage would of course be the concept of "Glass Artists Rock" (kind
of like a pet rock for glass artists!). Anyway, no sooner did I get this idea
for the magless and everybody on the board starts talking about rocks, ugh! I
feared the novelty would be lost but after debating many ideas (including
making big frit-decorated earths and cutting them into puzzle/jigsaw pieces)
and labeling those "the big picture"), I decided I still loved the
rock idea.
Now, I was pretty
diligent about baking my glass rocks and then submitting them to wet, cold tile
to see whether how fragile they were and use only those ones that appeared to
be stable. I hope that a year from now all your little rocks are still intact
but if nothing else - it's the thought that counts and Glass Artists totally do
Rock! I hope you like yours.
MATERIALS:
Spectrum clear
caps with Hanovia gold writing. Clear tops were cut, written on and then fired
over fiber paper to create a "cap" for the rocks.
Rocks which were
actually green in color (small pebble types for fountain decor) were placed on
top of Spectrum white baroque squares.
The
"sandwich" of white base, rock and imprinted clear caps were then
melted together (as well as possible, some of you have some "premies"
which might be almost completely melted.
Two out of every
three pieces survived. I tried using my Skutt 13" kiln but it was taking
so long to get each stage done so I resorted to using my two Paragon Quikfires
instead (these things are great for fast results, if you don't have one, I
encourage you to consider one for testing ideas fast!).
Unfortunately,
the Quikfires aren't real precise on temperature and time so if you're like me
buzzing around and you suddenly remember you have them both going and they are
now at 1600 degree for who knows how long... you'll understand why my success
rate was haunted with a 30% failure rate. But the pieces that survived are
adorable and I'm very proud of them.
And, I managed to
commit to the exchange, file for divorce, pack all my things away for months
and get them unpacked with 1.5 weekends to get my maglesses done. Wow, what a
new year!
Special thanks
goes to Tess in Idaho for telling me about using Spectrum glasses that aren't
necessarily fusible successfully in my kiln. That was priceless advice, Tess -
thanks.
WHAT I LEARNED:
Don't do two
things at once: Fire and watch your kiln, or, eat ice cream - not both.
Don't turn on the
TV... it doesn't help and won't make you go faster. Instead tune into Prairie
Home Companion (on web) where you can listen instead of watch... people
survived for years with only radio, no wonder they got so much more done back
then...
Don't change your
mind at the last minute... otherwise you'll buy all the supplies for the
alternate plan THEN decide you liked the original now that you've spent $100 on
base glass and $80+ on frit that you may never use...
Don't wait till
the last minute. You'll lose more sleep thinking (i.e. worrying) about it than
just getting it done. You'll also spend a pretty penny overnighting what you
think weighs "nothing."
Quikfires are
great for figuring out what to do and what not to do - quickly.
Hanovia is great
and it's not as temperamental as you think (there's no way I'm NOT going to
smoke when I'm sequestered away for an entire weekend firing glass until 3:30
Sunday evening...).
Use lots of
extension cords to run your kilns off every fuse in the apartment, rather than
blowing them and only firing one kiln at once. Don't even think about your
electric bill... it'll arrive soon enough.
Generously use
strips of scrap fiber paper to separate little pieces from flowing into each
other (remember, my kiln shelves were 5.5" square). Also, buy extra
shelves so you can rotate shelves in and out and not lose time - good
investment.
Always fire up
your rocks to see what color they will be. They started as pretty light green
pebbles, fired to tan and when they cracked mid-heating and were dumped into
water turned dark forest green... go figure.
COMMON PROBLEMS:
Common problems
were small popping rocks (splitting from fast heat up, moisture, etc.) which
would then blow/tip the glass caps onto another piece (or multiple pieces).
I later started using
my little Paragon quickfire kilns to do the final firings so I could hear the
pop and tip the lid back to then use a "glass" stick (piece cut to a
point - hey it's not metal) so I could sweep the broken rock out, replace it
with a new one and then juggle the cap back into place before full temp was
reached or to juggle the misplaced cap off of the other pieces to avoid mass
failure to the majority of the 9 pieces each tiny shelf would fit.
Second most
common error was cooking the final pieces too much (and more rarely cooling too
fast). In these cases, the glass would compress too tightly to the rock and
obvious COE differences would fracture the glass across the rock, oftentimes
through the cap and base - sure death to a masterpiece.
Third most common
error was trapped moisture and air bubbles in the caps which would then create
"frothing" bubbles on top layer of glass. These tiny bubbles would
later burst making them unstable for delivery.
I can't wait to
see all the maglesses! I hope this write-up doesn't have everyone snoring and
that your New Year absolutely rocks!
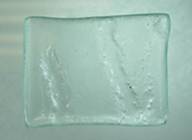 Sandcast
float glass—mini sculptures designed to demonstrate what types of textures you
can get and the fun you can have with sandcasting float glass. Some have the
devit on them, because I happen to like the look of it in sculptural pieces.
Glass is such a sensual medium (hold it, touch it, feel the undulations and the
sand texture.
Sandcast
float glass—mini sculptures designed to demonstrate what types of textures you
can get and the fun you can have with sandcasting float glass. Some have the
devit on them, because I happen to like the look of it in sculptural pieces.
Glass is such a sensual medium (hold it, touch it, feel the undulations and the
sand texture.
I learnt this
technique from Bert Weiss when I took his sandcast glass sink course last year
at his studio. I bought a large piece of his and have it in front of the pond
in front of my studio. Everyone goes up to it and touches it. That is what is
important to me, the tactile nature of glass. I don’t want to create something
that I can’t touch.
I used a BBQ fork
to make the designs and in the first batch, just dragged them width wise in the
sand, plaster, bentonite mixture. In the second batch I pressed the BBQ fork
down (somewhat like ducks feet) all over the sand base. I often paint these as
well, firing them both wet and dry and coming out with different effects (Ferro
sunshine series). I used a modified firing schedule from Gil Reynolds float
glass fusing tables. I probably should have held it at the top end a little
longer, but in most cases the edges rounded off nicely. I often use Gil’s
schedule as well as Bert’s schedules.
Hold them up to
the light and look at them, touch them and see if it moves you to want to try
sandcasting float glass.
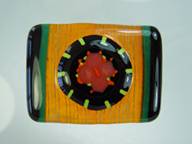
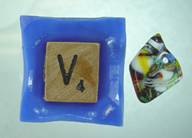
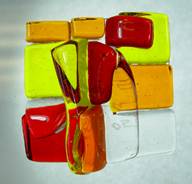
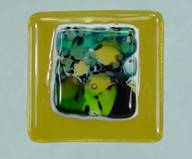
Various colors and sizes of pot melts were cut into 1"
squares with a tile saw. A 2" square of white opal was capped with a
2" square of clear, which then had the 1" square of pot melt placed
on top and fired to full fuse. The layer of clear between the white and pot
melt gave it the illusion of sort of floating over the white. All glass used
was S96.
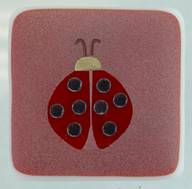 Using Spectrum 96, my magless was created by fusing a 1 5/8"
red square onto a 2" white square to form a frame. I then etched a ladybug, frosted the
background and applied two coats of black enamel paint for dots and accents.
Using Spectrum 96, my magless was created by fusing a 1 5/8"
red square onto a 2" white square to form a frame. I then etched a ladybug, frosted the
background and applied two coats of black enamel paint for dots and accents.
Last year I
etched a "bee" for Bebe, this year I etched a ladybug for my sister,
Judy Bug. What I learned: this design
did not support the amount of work that went into the magless!
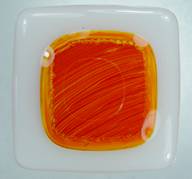
Paint and luster maglesses
1 put swirls and dots of paint on the glass (I
used 3-4 different colors)
2 take a toothpick and run through the colors to
create a marbled effect
3 let dry and then add lusters (I dipped a
paintbrush in water and then mixed with the lusters)
4 cover with clear and fully fuse
Originally, I was going to see if I could emboss
a Celtic knot on top of the mags with stamp embossing powder. I didn’t get it down quite right – will still
be playing with that. It took me a while
to figure out what I wanted to do this year, and when my mags were fired they came
out really cloudy looking (possibly devit).
I didn’t have time to sandblast, glaze and refire (tried on one batch
and they didn’t work) so I wound up pouring clear nail polish on them, which
did help a lot. Sorry – I know that’s
not so professional, but I leaned that it will work if you’re in a bind. I should have learned that I need to start
projects earlier, but that lesson seems to be a little slow going for me.
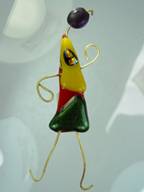 Heidi Kruse, Sharyn
Wiley, Kim Rafferty with her daughter Kate, along with students from Alpenglow Elementary School helped me create some
one-of-kind "People". We used Bullseye glass, 16-gauge brass wire,
and a selection of glass beads for heads. The kids selected a glass body. They
then created a head by stringing a glass bead onto wire and securing it by
curling the wire. (Sharyn helped make some of these ahead of time which really
helped!!) The wire neck was placed on the body along with wire arms and legs.
These were glued into place and sandwiched by another piece of glass. The final
touches of stringers, dichroic glass, or confetti were added to the top glass.
The float glass bead heads were positioned so they would not touch the Bullseye
glass since they aren't compatible. The "People" were carefully
placed in a glass kiln and fired 500dph to 1420 and held 10 minutes. Then they
were cooled (as fast as possible) 9999dph to 1000 degrees and held 20 minutes.
After that, the kiln was turned off and the creations slowly cooled. Once
cooled, they were put into a pickling solution of vinegar for a 2-hour soak.
This helped remove some of the black residue on the brass.
Heidi Kruse, Sharyn
Wiley, Kim Rafferty with her daughter Kate, along with students from Alpenglow Elementary School helped me create some
one-of-kind "People". We used Bullseye glass, 16-gauge brass wire,
and a selection of glass beads for heads. The kids selected a glass body. They
then created a head by stringing a glass bead onto wire and securing it by
curling the wire. (Sharyn helped make some of these ahead of time which really
helped!!) The wire neck was placed on the body along with wire arms and legs.
These were glued into place and sandwiched by another piece of glass. The final
touches of stringers, dichroic glass, or confetti were added to the top glass.
The float glass bead heads were positioned so they would not touch the Bullseye
glass since they aren't compatible. The "People" were carefully
placed in a glass kiln and fired 500dph to 1420 and held 10 minutes. Then they
were cooled (as fast as possible) 9999dph to 1000 degrees and held 20 minutes.
After that, the kiln was turned off and the creations slowly cooled. Once
cooled, they were put into a pickling solution of vinegar for a 2-hour soak.
This helped remove some of the black residue on the brass.
What I Learned:
Hmmmm, I am so tired of doing "People"! The first batch was
"burnt offerings" because I fired them to 1420 using the school's
ceramic kiln which I have done in the past with great results. My big mistake
was to check the kiln at 1420 and liking the results, shut it off. I should
have flash vented the kiln to 1000, held 20 minutes, and then shut it down....
The huge ceramic kiln and all the side elements held in sooooo much heat that
the little people melted way too much! Lesson Learned!!!
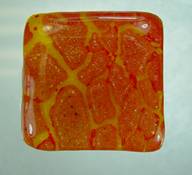
 Ordered Tangerine cathedral,
mistakenly received tangerine “fibroid”
Ordered Tangerine cathedral,
mistakenly received tangerine “fibroid”
cathedral.
Experimented with ways to make use of this beautiful color.
*cut strips of tangerine
*sprinkled with mica
*topped with another strip of fibroid with texture crosswise
(or later, topped with layer of clear) *edged with jade green and black strips
on edge *dammed w/fiber strips surrounding and full fused.
*cut into squares w/tile saw, then ground and sanded extensively
*created round pattern bars using fiber lined 1” & 3”steel pipes filled
with various colors of rods and stringers (these were then sliced on tile saw)
* topped magless squares with p.b. slices or with sliced
murrini bits
* fired to contour fuse and retain raised elements of design
(lessons learned…..many!!! One way to
use fibroid, but hope to learn of more uses.)
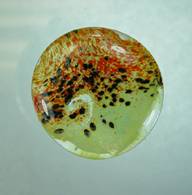
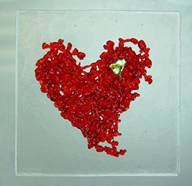
 These mags were inspired by glass
pizza my son starting making a couple of years ago. They were tons of fun and
each pie was made differently.
These mags were inspired by glass
pizza my son starting making a couple of years ago. They were tons of fun and
each pie was made differently.
Begin with a 5" base circle of Spectrum almond opal.
Then add frit, stringer, noodles and hand cut pieces to make mushrooms,
veggies, sausage or any topping of your choice.
They are fired, sliced and then fire
polished for the smooth edge.
Just don't mange!!
 From
From
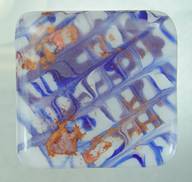
What I did: After accepting that I didn’t need to produce
something brilliant & that no one had ever before attempted, I settled on
larger-scale tweaking and experimenting of combing techniques I’ve been having
fun with…. I’ve loved combed pieces with unexpected pockets of translucence, so
I created 2 runs of combed pieces comprised primarily of cathedral glass: all
Bullseye, and mostly deep red, dark blue, steel blue, and smoky gray, along
with some clear, and a few strips (each) of opaque white, lilac, and sky blue.
If I hadn’t been cutting the strips while simultaneously trying to feed the
6-year-old animals at my house for a slumber party, I would’ve written down the
color names and proportions of each. I never or rarely put 2 strips of the same
color together – strips/colors were otherwise randomly arranged. I ramped up
AFAP to 1700, and combed top-to-bottom vertically, then horizontally, then
vertically. After the 3rd combing for run #1, I threw in handfuls of
large chunks of irid turquoise and green and finer bits of light aventurine
green, reheated back up to 1700 and gently combed in the frit. After re-heating
to 1700, I cooled/annealed as usual. The piece was then cut into 1” squares,
fused onto 1½” clear bases. Fortunately, I didn’t need the second batch, since
the kiln stopped getting hot halfway through combing (and which Teresa - #85
& who’d already mailed her maglesses – insists was not her fault). For that 2nd batch that I might
resurrect in 2006, probably 1/3 – 1/2 of all strips were clear tekta, and I
used less smoky gray. Most opaque pieces were surrounded by clear strips for
this 2nd combed piece, and I got what I wanted in purer colors (less
dark gray mushy color), and more translucency.
What I learned: Cathedral glass can become opaque at high temps. I
should expect smoky gray cathedral glass to behave more like opaque black in a
combed piece…and maybe “buffer” it with clear so that it doesn’t muddy other
colors. When combing, if not putting multiple strips of the same color
together, you can expect some colors to “disappear,” which is fun if you like
unexpected surprises (you won’t see any of the lilac or white in any blobs).
Throwing even just a teaspoon of aventurine green fine frit adds a sparkle
throughout a 12”x12” piece. Combing large chunks of frit thrown into the mix
didn’t add quite the impact I’d intended; maybe need more, larger chunks to
create a more spotted & batik-like? I’ll definitely use more clear base
glass between colored strips when combing -- I like the effect. Re-fusing the combed squares onto clear bases
seemed to “dilute” the intensity of the color a tad, and I like my finished
blobs much better than I liked the whole piece (and some blobs much more than
others, and sometimes the back more than the front). Most importantly, I
learned (or was reminded that) one should never, ever turn one’s attention away
from a house with 6-year-olds quietly eating dinner at their first slumber
party, even if for just a few minutes to cut strips and with 2 teenagers and
another adult there purportedly to help. Finally, I might also concede that my
mother could’ve been right all these years in that waiting until the last
minute to do something leaves very little time to handle unforeseen emergencies
like a kiln that stops getting hot.
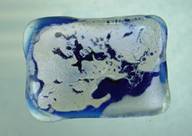
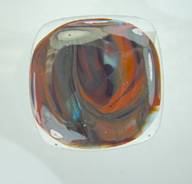
 This is the
"Woops I Screwed up Mag"
This is the
"Woops I Screwed up Mag"
Float with float
frit, fired at 1750 degree's by mistake. Took one look and decided it looked
very cool!
What I Learned: Mistakes can be a Good thing!
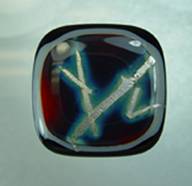
56 Deb/Shane Compton
 Being a “newby” to the fusing world,
I knew I could never “wow” you with my artistic ability! That said I focused most of my effort on trying
to figure out how I could send a message with a small piece of glass. I had a couple of ideas but when the rubber
hit the road they seemed to fizzle!
Being a “newby” to the fusing world,
I knew I could never “wow” you with my artistic ability! That said I focused most of my effort on trying
to figure out how I could send a message with a small piece of glass. I had a couple of ideas but when the rubber
hit the road they seemed to fizzle!
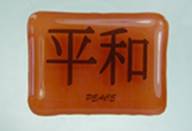
I finally figured out my message, around Christmas
time. I asked a friend what she wanted
for Christmas and she said “World Peace.”
At the time I thought, “Yea whatever, you better like what I got
you!” All joking aside, we all want
“World Peace.” Our little magnet
exchange includes friends from around the world, so I would like to send a
message of peace; thus the Chinese Calligraphy symbol for peace.
I started with a 1 1/8 x 1 1/2 inch rectangle of System 96
Terra Cotta and capped that with the System 96 High Fire Clear Iridescent
(iridescent side down) cut just a tad bit larger. I fired the rectangles to 1480 F.
This is where the lessons learned part comes in….I wanted to
paint the calligraphy symbol on each piece.
I tried the liquid gold, the white pens and cutting the glass. None of it worked to my satisfaction! Thank goodness I was able to find a small
black decal that “fit the ticket!” I
placed the calligraphy decals and fired again to 1400 F.
I’m thrilled to be able to participate, and look forward to
continue to learn from you all!
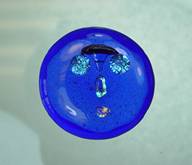
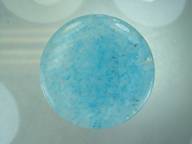
 What's it like inside your bubble?
The
science of BUBBLES. If you can't fight em, join em.
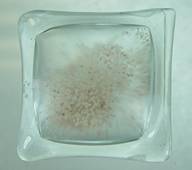
Souvenir
Sand Pillows
1st mag entries:
Simple
directions:
Bottom blank of 1
3/4" float
Top piece 1
7/8" float, cut from same piece of glass as the bottom blank for
compatibility. Clean well. Lay out on kilnwashed shelf. 1 drop Empire Village water
from eyedropper in center of bottom blank. 1/8 tsp, about what you'd find in
your teeth on a windy day, of beach sand. Preferably using sand that was blown
into the parking areas, found in the kid's tennies, brushed from your hair, or
shaken from your
sleeping bag.
Sweeping it from your kitchen floor does not work. Place in kiln, close, turn
onto high. Mine takes 36-38 minutes to be complete. Opening the lid to peek
during the final 2-3 minutes, even if you have a window, appears to have some
impact on the pillows ability to seal and retain its dome. Do not Crash cool,
they will indent. If they indent anyways, you can turn the heat back on and
wait for them to rise up again. Sometimes. Let cool to room temperature. I
think I'll turn my hand to the science of cooking. Soufflés and bread couldn’t
rise and fall and fail with the serendipiticty that these have. I made every
observation possible: Which corner failed: each one at a different firing.
Change overhang, measure either ingredients, or random sprinkle. Cleaned all
glass around the sand pile to prevent air channels, nada. None discriminational
failures. As the man says, wodeva!
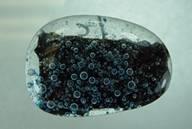
2nd entry:
Amoeba
HubbleBubbles
I set up a dam of
vermiculite bars, put onto a well-prepared kiln shelf. Sprinkle the bottom with
white powdered frit. Some were made using a white thin glass. I also did some
with BE cranberry, and a few with a navy blue iridized bottom. Then toss a
light layer of clear frit to cover, then spread copper oxide over all, not
fully covering frit layer. A generous layer of clear frit, medium grade, over
the top to the depth desired. Generally, I layered this to a height about 1/3
higher than I wanted the thickness of this slab to be. Ramp AFAP to fuse temp,
depending on your kiln. My papa kiln went to 1420f and a quick peek showed a
nice smooth glossy finish. Shut off and cool to AFAP 1000f. Then cooled to room
temperature at a rate of about 200 dph. Since my kiln has an additional sand
bottom, I just turned off the kiln at 1000f. Annealing is not a big issue since
these get cut up and fired again. When cooled, I found that a manual tile
cutter to work well, as long as the blocks were not too thick. When the
thickness was just right, the cut was very uniform. When the blocks were 1/8
inch thicker, it was more like smashing chunkage. These are my amoeba pieces,
made during desperate times and using desperate measures. Out of glass, out of
time, out of my mind. After cutting into 1 1/2"pieces, I set them out onto
a kiln shelf and fired them in the mama kiln, AFAP to 1500f, or until they have
rounded out a bit and before the bubbles get a chance to come all of the way
through the glass. Turned off kiln and let cool from the top temp to room
temperature. That's the way I make them, uh huh, uh huh
If you would like a pictorial on the sand
pillows, or would like to see what they look like, please go to http://community.webshots.com/album/260918045CnVCUY
Here is the spiel that I print onto little business size cards that explain to
tourists what the sand pillows are all about:
National Lakeshore,
Empire beach is a prime international tourist destination. Renowned for its
fine sandy beaches and spectacular sunsets over Lake Michigan, all who come want a piece of
it. Our sand and stones are collected in bags, buckets, teeth, car floorboards and
shoes. It's also in hair and in bed as a fond, if annoying, remembrance of
idyllic days and romantic evenings. Frequently visitors wish to purchase land
on our "gold coast". So here is a great solution for a variety of
needs.
Beach property
without exorbitant land tax bills.
(You'll get your
statement in the winter).
Souvenirs in something more sustainable than a
baggie, and a
magnet for
collectors.
These were also made using certified pure
sweetest purified filtrated water from Lake Michigan. All sand wind blown from beach before it was
encapsulated here for posterity.
From the wind blown mind of a local warmglass
worker,
What
I Learned Along the way OR, How this all came about.
40 "sand
bubble" maglesses were my original plan. The rest are amoeba shaped copper
oxide bubbles. Some almost look like the Hubble shots of the universe I keep on
my desktop, and have become my favorites. They came out OK, and they are fun to
fondle! Serendipity! My 40 sand glass pillow souvenirs started as an attempt to
make souvenirs that would contain a sand picture of a bear. I painstakingly
created the outline of a bear using a variety of glues and waters. After
firing, they came out looking like ravioli. My disappointment was instantly
replaced by the novelty of creating such and awesome shape. They had a ruan or
talisman affect whenever I held it. Fun to fondle. I presume that the bubble is
raised by all of the known reasons for bubbles appearing unwanted in our finer
items. Trapped air, fast heat, & quick cool. I started the experiments in
my baby Evenheat, so I could only make 4 at a time. I believe that the ability
for the little kiln to reach high temps of 1650 f in 36 minutes made these
possible to raise, stretch, and seal before outgassing. I achieved this desired
effect while making them as souvenirs. But just try to make them en masse,
intentionally. Whenever I make these for the local shops, I can crank out four
as I'm prepping something else. However, setting up four on demand results in 3
out of 4 successes, 2 of 4, and even 1 of 4. Having signed up for this project
early, sent my check in immediately, and having a plan in mind, it was supposed
to be a no brainer to achieve the goal quantively and timely. At 4 a day, I had
plenty of time. As mentioned, they started giving less than optimum results on
a daily basis. Then my DH had emergency open-heart bypass surgery. 6 weeks
after that I spent 6 days in the hospital after 3 weeks of illness due to
having a bad drug reaction. Then DH had a relapse and another hospitalization.
All of these events tend to take a lot out of you. duh. Studio time was barely
in the schedule. The kiln gods are much more devious that I ever imagined.
Getting down to the final few days left, I put 30 into PaPa kiln to see if it could
achieve the same rising effect that I believed speed has forced to occur. I
knew that wouldn't work, but what if I was wrong and it worked? I'd be so
ahead! What an ugly mess of devit, caved and cracked, hazed, and worst of all,
NO BUBBLES! YECH! Then I tried 4 loads in one day in the baby kiln, with four
mags each load. Three mags passed inspection. The "inspector" was
willing to accept less than perfect, but even that was not to be. 3 Mags. Less
than a week to finish. I reached into my bag of experiments, and realized that
the copper oxide cabs I'd been making were another great example of beautiful
bubbles and unique. So a theme was born.
What did I learn?
*If you think you
have plenty of time, crank 'em.
*If you don't need
them, just do it for fun. Stock em.
*If you are
desperate, find something else that you
can do instead.
*Don't make
promises that you think you can keep.
*Don't sweat the
small stuff
*It's all small
stuff, all things considered
*While not what I
planned, I'm glad I could find a way to rationalize the bubble concept and
complete it. It was a real close call!
 First make a pattern bar using BE clear and yellow stringer
that has been broken into small pieces mixed up thoroughly.
First make a pattern bar using BE clear and yellow stringer
that has been broken into small pieces mixed up thoroughly.
Then slice the pattern bar into 1/4 inch slices.
Then place on top of regular thickness black BE and take to a full fuse.
Anneal, and you are through.
Simple huh?
I learned how to make pattern bars and how the clear glass disappears into a
base color.
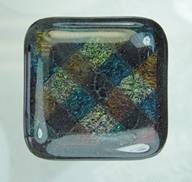
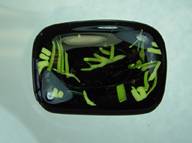
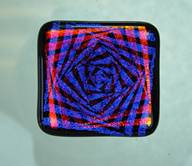
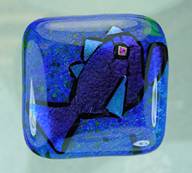
 1. Cut triangles from pre-fused patterned slabs of dichroic
on
1. Cut triangles from pre-fused patterned slabs of dichroic
on
black
with clear cap.
2.
Glued dichro triangles and black stringers onto dk cobalt,
onto
black back.
3.
Fired at (approximately) 1000dph to 1100, 175 dph to 1450, 999
to
1000, 250 dph to 750.
What
I learned:
Being a relative newbie, I think my lessons were many, but pretty
basic:
of these, never do 100 of anything using a hot box and
manual
infinite switch comes to mind, as well as never ever do
anything
again en masse involving dark cobalt (unless it's to use
up
all the wonky scrap I now have...).
On the plus side, it was interesting trying to maintain a certain
consistency
throughout many batches, especially with aiming for
that
state where the glass goes glossy between tack and fuse (is
there
a name for this? demi-fuse? Ultra tack?)
If I'd had more time, I might have played with design more--but I
did
want something with fairly simple and clean lines, and since
I
mostly work with dichroic glass, wanted to include an element
of
that. I also liked the 3-dimensional aspect, and want to play
with
that some more.
60 – No Entry
 Short
answer: Pate de Verre
Short
answer: Pate de Verre
Long story:
As I am not a
fuser, my options were casting and PdV.
I had just
developed a product line "Water Lily" in PdV, so it was only to scale
it down.
But it wasn't.
My PdV process
relies on temp difference. The air side, bottom of the piece is full fused,
while the displayed surface is only tack fused, leaving a
sugarlike
appearance if made of clear frit.
First scaling
down the design: It did not work, the details were lost.
Second firing
that half mature: For 1" it is OK, for ½" it is really time critical.
I modeled the
"final" design in clay, and bisque fired it.
Then I took a
plaster mould, and slip casted a dozen,
and made several
one piece waste moulds over these for testing the schedule.
I found the right
combo, and slip casted six clay macettes.
These I fastened
on a clay slab, made a second plaster mould, and
into that a
silicon master.
The silicon
master was used to make working moulds for sets of six.
The first six
were badly overcooked.
I PANICKED.
After 5 more
trials I got six reasonable blobs out, and started
production. I
could fire 3x6 every second day.
What I Learned.
1. In small
pieces, one must measure the glass carefully. Much of the variance was due to
different thickness.
2. In PdV the
thermal capacity of the mould is big, 10 to 1 against glass volume. That
affects the firing a lot if moulds are of different thickness.
3. This kind of
complicated process details are lost at every stage,
that is why half
of you get nothing but a blob, while few lucky
get a moderate
piece.
4. When tack
fusing powder remember to add WARNING:
" Some glass
particles may fall off this piece
DO NOT let
children play with this"
5. In really time
critical jobs the controller is too slow,
I had to watch
and manually time the working temp
(afap to 720 C
720 C for 15
secs, manually
afap to 550C
annealing)
6. Next year I
make something easier!!
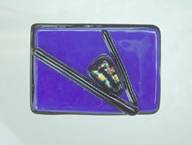
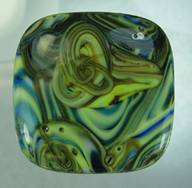 I cut thin strips of
blue yellow and white, and placed them on edge stacked together on top of a
barbecue grill supported by kiln furniture. Sort of like a pot melt on steroids.
I used a clear piece lining the bottom.
After that, just sliced them into squares and refired to round off the
edges.
I cut thin strips of
blue yellow and white, and placed them on edge stacked together on top of a
barbecue grill supported by kiln furniture. Sort of like a pot melt on steroids.
I used a clear piece lining the bottom.
After that, just sliced them into squares and refired to round off the
edges.
Etched repeating pattern in Bullseye Gold and Rainbow iridescent
coatings using RapidMask resist and sandblaster. Cut pattern pieces apart,
assembled with base glass, and fired ASAP to 1495, annealed, and cooled.
What I learned:
I need more
practice sandblasting.
And, I need a
bigger sandblasting setup.
64 Dianne Van de Carr
Bullseye
glass was used for all the pieces. I cut 2 squares, one of iridized glass for
the bottom and a second from mardigras glass a tiny bit bigger. I put a
sprinkling of fine 0126 frit between the layers. Dichro pieces were cut into
the fish shapes. Sharp edges were grozed away and then they were fired.
What I learned? To do a test before firing 75 maglesses. I found that there was
not enough contrast between the iridized glass and the 4217 mardigras. The 4212
was much brighter and I liked it better. The 0126 frit did not show, perhaps a
medium would have been better.
 My magnets were made by beginning with a base layer of glass, then
adding many pieces of smaller squares and rectangles as the second layer. The only
thing a bit different is that I also set some of the pieces of glass on their
edge making them taller so that when held for a few minutes at a tack fuse
temp. They would fall over onto each other. The interesting thing in making all
106 of them was the viscosity between the different glasses was fun to watch
and experiment with. Lastly, I made these in my smallest kiln in small batches
of about 14 (I found it easier to care about 14 at a time than 106) and I
always said you couldn't break anything in the baby kiln (small 9" Jen
My magnets were made by beginning with a base layer of glass, then
adding many pieces of smaller squares and rectangles as the second layer. The only
thing a bit different is that I also set some of the pieces of glass on their
edge making them taller so that when held for a few minutes at a tack fuse
temp. They would fall over onto each other. The interesting thing in making all
106 of them was the viscosity between the different glasses was fun to watch
and experiment with. Lastly, I made these in my smallest kiln in small batches
of about 14 (I found it easier to care about 14 at a time than 106) and I
always said you couldn't break anything in the baby kiln (small 9" Jen
Ken) but I
finally proved myself wrong. I initially did not anneal just rushed and cracked
the lid and took them out ASAP, but days later a few of them would break apart
at the places where it was thicker (I healed them and sent them along so some
people might be able to see the seam), which had never happened on anything I
had made. Before I sent them out I put them all in my big kiln brought them up
to 1200 and then all the way down to room temp with an overnight anneal. I hope
everyone likes them.
 Supplies: respirator, nitrile gloves, mallet,
newspaper, mosaic cutters, kiln wash, 3" flower pot saucers, black copper
oxide powder, standard glass grinder with 100 grit and 600 grit heads.
Supplies: respirator, nitrile gloves, mallet,
newspaper, mosaic cutters, kiln wash, 3" flower pot saucers, black copper
oxide powder, standard glass grinder with 100 grit and 600 grit heads.
Glass: Bullseye white and clear, white powder. Also
used white medium and coarse frit and clear coarse when needed (hand too
tired to do any more crunching with mosaic cutter).
How-To: Wipe flowerpot saucers with damp paper towel before kiln
washing. Score white sheet glass all over the place, put into several sheets of
newspaper, take mallet and smash it to bits. Sift white powder over bottom of
flowerpot saucer; dump a layer of various sized white frits over the powder. If
need be, use mosaic cutters to make smaller pieces. While wearing gloves,
sprinkle copper oxide on top of white glass. Make clear frit using the mallet.
Cover the copper oxide with layer of the clear frit. Sprinkle more copper
oxide. Cover with large chunks of clear. Fuse. Because the flowerpot saucers don't
have straight walls, I had to grind the edges straight. This took
FOREVER!!!!!!!!!! I also added a bevel on top. With the first few, I
did a bevel on the bottom, but it took way too long and so quit doing
it. After using the 100 grit head to remove material, I used a 600 grit
grinding head sent to me by Jeffrey at Aanraku to test. After all that,
clean and firepolish.
What I learned: Simple design does not necessarily mean simple
execution. These took way longer to make than I ever wanted to spend on them. I
was surprised by the difference in thicknesses between the pieces as well. The
saucers may look equally filled, but they ranged in thickness from
1/4"-5/8" Therefore, some are closer to paperweights than maglesses.
Haha! This was also my first time to add a bevel to anything and it was much
more difficult to get it looking good and somewhat even than I ever
anticipated.
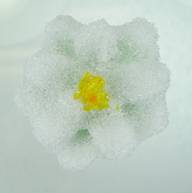
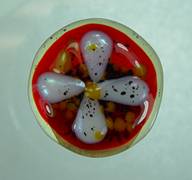 Cut 1 28mm circle of light amber cathedral, 1
22mm circle of red cathedral, and 4 triangles approx. 5x10 mm of iridized white
opal. Slightly
groze 2 corners of each triangle to approximate a teardrop shape. Glue is
helpful when assembling the pieces. Center the red circle on top of the amber
circle, arrange the white petals on top of the red circle, and sprinkle with
medium orange and fine black frit. Fire to a medium fuse, allowing the petals
to stay slightly raised.
Cut 1 28mm circle of light amber cathedral, 1
22mm circle of red cathedral, and 4 triangles approx. 5x10 mm of iridized white
opal. Slightly
groze 2 corners of each triangle to approximate a teardrop shape. Glue is
helpful when assembling the pieces. Center the red circle on top of the amber
circle, arrange the white petals on top of the red circle, and sprinkle with
medium orange and fine black frit. Fire to a medium fuse, allowing the petals
to stay slightly raised.
What I Learned:
I like to groze shapes, rather than grinding them, to minimize
devit. Small pieces like the white petals will round themselves out nicely without
a lot of fussing over the shape. Grozed circles are not quite as forgiving,
especially in a single layer of glass. The edge will smooth out, but won't
always produce an even shape. Stacking two same-sized circles (of standard
thickness glass) makes it easier to get a truer circle from grozed edges.
Stacking graduated circles, like I did in my magless design, leaves a smaller
margin of error (hence the slightly wonky shape). In regards to B.E. white irid
glass, I found it easier to cut on the iridized side. I was taught to cut any
coated glass (irid, mirror, flash) on the non-coated side, but this is
definitely an exception.
I chose this color combination for the relative stiffness of the
different colors. One of my color prototypes had white petals on a gray opal
background, but the two colors were about the same stiffness, so I had a harder
time getting the background to fully fuse without the petals sinking into it.
Using softer cathedral colors as a background let me get the effect I wanted:
the petals stayed bumpy, but the background colors melted into each other.
Glue was a necessity, given the number of maglesses, and the
number of components per piece. I glued the base circles together first, with a
very tiny amount of Glastac, and let them set up before adding the petals and
frit. Jeweler's bent-tip tweezers help with placing small pieces like the
petals. I used to use Elmer's glue before switching to Glastac, and I'm not a
big fan of either one. Elmer's has a much better working consistency, IMO, but
it often leaves a residue on fired pieces, which I don't want. Usually, I find
Glastac too runny, but in this case that was helpful. The longer drying time
let me work on bigger batches, and was good for applying frit. For the petals
and frit, I put one dot of glue in the middle of the circle, and smeared it
around with my finger to make a very thin coating. Too much glue on the surface
makes all of the pieces float all over the place, and that is really
frustrating when you have to keep going back and adjusting them as they dry.
But full surface coverage is important, so you have the most area for the frit
to stick to. If I were to redo my design, though, I might have only used fine
frit. The larger pieces of medium frit had a tendency to tumble off the sides
and become little edge warts when fired. I think it might have helped too if I
had let the glue dry completely before popping everything into the kiln.
And lastly, after cranking everything out in a single weekend, I
relearned the old Calvin and Hobbes philosophy that "The best inspiration
is last-minute panic."
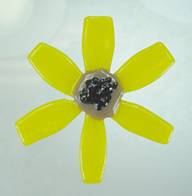
In an effort to
bring a touch of Spring to those who are thawing out this Winter:
These Black Eyed
Susans are just a simple use of BE thin yellow anchored to a café au lait
center with BE Stiff Black frit in a single tack fuse firing to 1375.
Happy Spring
Everyone!
 How to: My maglesses were fused, then cut
and tack fused to a transparent layer. Some of my pieces were cut from a
thick fused slab, then fire-polished. 100% Bullseye glass.
How to: My maglesses were fused, then cut
and tack fused to a transparent layer. Some of my pieces were cut from a
thick fused slab, then fire-polished. 100% Bullseye glass.
What I learned: Thick fused glass is really hard to cut with
hand tools, especially if it is well annealed.
Click here to see photos and
how-to’s for the first group of 35 participants in the 2005 exchange.
Click here to see photos and how-to’s for the third group of 35 participants in the 2005 exchange.